
Travel Steamer for Garments: How to Choose the Right One for Your Trips
One of the things I hated most about traveling was opening my suitcase and finding a shirt covered in wrinkles.
It’s especially frustrating on business trips. You arrive, your luggage arrives, and the meeting is still on schedule. Your clothes are the only thing that didn’t quite make it there looking their best.
That’s when I started carrying a travel garment steamer.
I wasn’t looking for perfectly pressed clothes. I just wanted my shirts to look presentable after a long trip. A few minutes with a compact steamer was usually enough to make a noticeable difference.
If you’re thinking about buying a travel steamer for garments, I wouldn’t focus only on steam power. Weight, heat-up time, water capacity, voltage compatibility, and the types of clothes you usually wear can all make a difference once you’re actually on the road.

Why Is a Travel Steamer for Garments So Useful?
Packing clothes tightly into a suitcase is one of the main reasons they come out wrinkled.
Clothes get folded, packed tightly, and carried around for hours before you reach your destination. By the time you unpack, even clothes that looked neat when you left home can have noticeable wrinkles.
A compact travel garment steamer gives you a simple way to deal with them once you arrive.
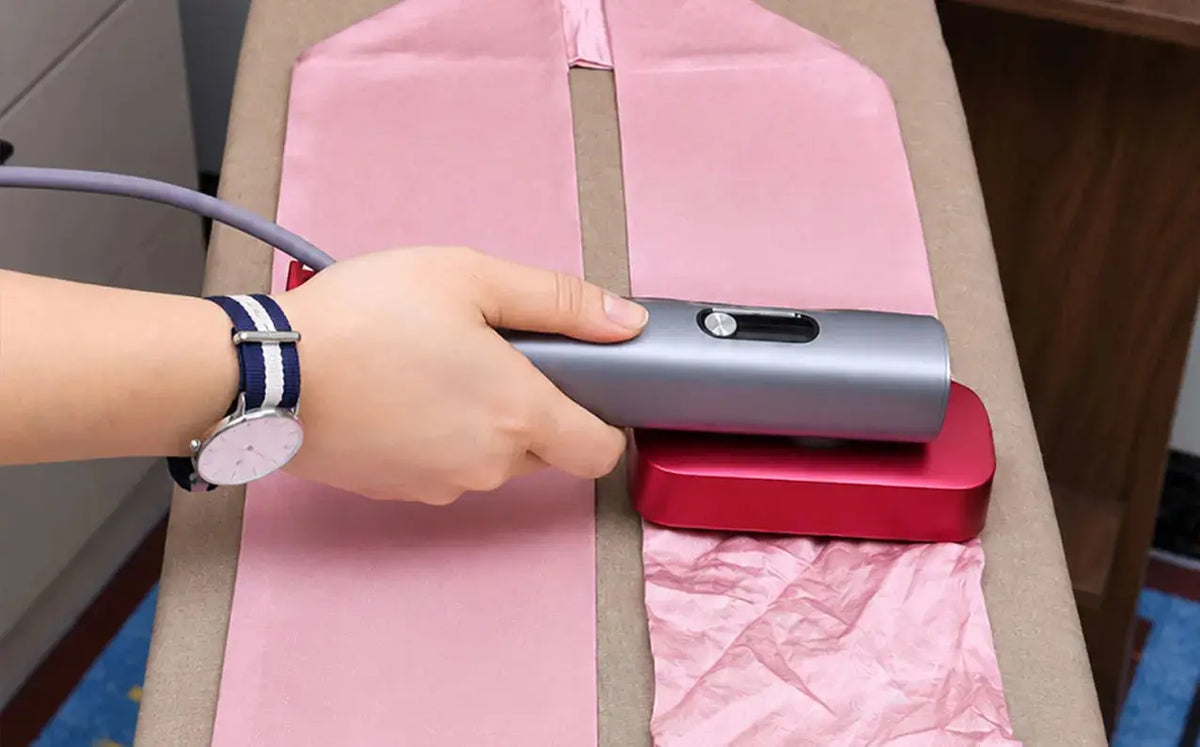
Hang the garment up, gently pull the fabric taut, and move the steam across the wrinkled areas. This works well for shirts, T-shirts, dresses, linen clothing, and many everyday garments.
I find this especially useful when traveling because a good portable steamer doesn’t require much space or setup.
Hotel rooms aren’t usually designed for complicated clothing-care routines. For me, a travel-friendly steamer should be easy to take out, fill with water, heat up, and use.
What I Look for in a Travel Steamer for Garments
1. Weight: When You’re Traveling, Lighter Really Does Feel Better
Weight is easy to overlook when you’re comparing steamers online.
At home, a little extra weight may not matter. Once your suitcase is full of clothes, shoes, toiletries, and electronics, though, even a few extra ounces can make a difference.
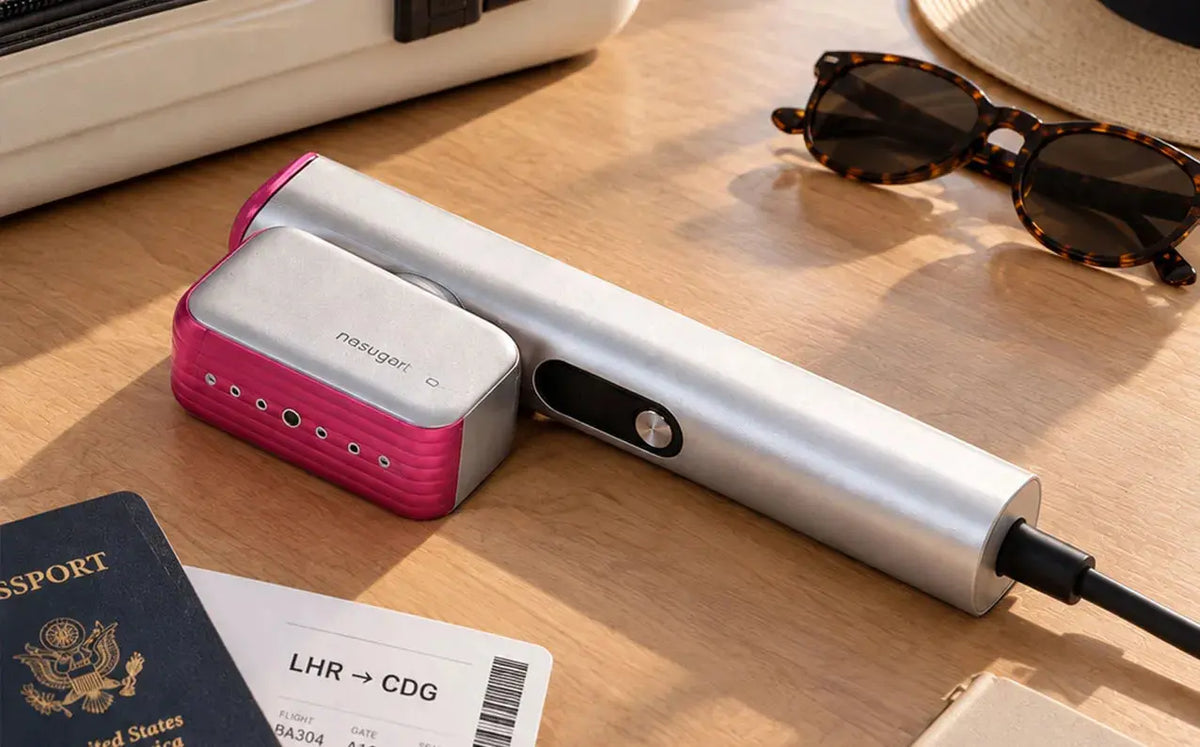
For example, the NESUGAR G2 Pro weighs about 0.8 lb and supports a 100–240V voltage range, making it a particularly travel-friendly option.
For short trips, weekend getaways, or carry-on travel, I’d prioritize a compact, lightweight design instead of automatically choosing a model with the largest water tank.
For me, the best travel accessory is one that doesn’t add much bulk or weight to my luggage.
2. Heat-Up Time: Less Waiting Is Always Better
You’ll really notice the value of fast heat-up time when you’re getting ready in a hotel room.
Imagine getting ready for a morning meeting and noticing a wrinkled shirt just before you need to leave. In that situation, a steamer that heats up quickly can save you a few valuable minutes.
Some portable garment steamers can be ready to use in around 15 seconds. Some NESUGAR travel models also advertise a heat-up time of about 15 seconds.
For a travel steamer, that kind of quick startup makes it much easier to work into your morning routine.
When you’re traveling, saving a few minutes in the morning can make getting ready a lot less stressful.
3. Voltage: Pay Attention If You Travel Internationally
Voltage is one specification I always check before an international trip.
Different countries and regions use different electrical standards. If you travel internationally on a regular basis, a 100–240V dual-voltage steamer can make things much easier.
There’s an important difference between a plug adapter and a voltage converter.
A plug adapter lets your device’s plug fit into a different type of outlet. It does not change the voltage coming from that outlet.
Before an international trip, check the voltage information on the steamer and compare it with the electrical standard at your destination.
If the steamer supports the local voltage, you’ll generally only need the appropriate plug adapter. If it doesn’t, check whether you need a voltage converter and whether the steamer is compatible with it.
It may not be the most exciting thing to check, but it can save you from an unpleasant surprise when you arrive.
4. Water Tank Size: Bigger Isn’t Always Better
A larger water tank can give you more steaming time, but it also adds weight and takes up more space.
If you’re only steaming one or two shirts a day, a smaller tank may be perfectly adequate.
If you’re traveling for several days and need to freshen up multiple outfits, a larger tank can be more convenient.
For example, the NESUGAR G5 Pro has a 200 ml water tank, making it better suited to situations where you want to steam several garments in one session.
In practice, I’d choose based on the length of the trip:
For short trips, prioritize portability. For longer trips, consider water capacity and steaming time.
If you only need to steam a few garments, carrying a larger tank may not be worth the extra weight.
5. Steam Power: More Isn’t Automatically Better
If you’re buying your first travel steamer, don’t assume that higher steam output is always better.
High steam output can be useful, but different fabrics still require different levels of heat and steam.
Cotton, linen, polyester, wool, silk, and blended fabrics can all respond differently to heat and moisture.
When I use a travel steamer, I don’t automatically use the highest setting. My routine is simple:
Check the garment care label → test a small area if I’m unsure → use the appropriate setting → keep the steamer moving.
I’m especially careful with silk, specialty fabrics, coated materials, and garments with delicate embellishments.
Always follow the garment’s care label instead of automatically using the highest heat or steam setting.

How to Use a Travel Steamer Effectively in a Hotel Room
Here’s how I usually steam clothes in a hotel room.
Step 1: Hang the Garment Up
When I take clothes out of my suitcase, I usually leave them hanging for a few minutes before steaming.
Some light wrinkles may loosen on their own, and hanging the garment first also makes it easier to see which areas actually need steaming.
If the hotel has a closet, bathroom door, or suitable hanger, I choose a spot where the garment can hang freely without touching other surfaces.
Step 2: Work From Top to Bottom
For a shirt or dress, I usually start around the shoulders and work my way down.
With my free hand, I gently pull the fabric taut while moving the steamer steadily across the garment.
Move the steamer across the fabric instead of holding it over one spot for too long.
Working in sections also makes it easier to see which areas still need attention.
Step 3: Give the Garment Some Time to Dry
Steam adds moisture to the fabric, so I don’t immediately put the garment back into my suitcase after steaming.
Let it hang for a little while so the remaining moisture can evaporate before wearing or packing it.
This is especially helpful if you need to pack the garment again later in the day.
Which Clothes Are Best for a Travel Steamer?
When I travel, I most often use a steamer for:
- Dress shirts
- T-shirts
- Dresses
- Lightweight jackets
- Linen clothing
- Polyester garments
- Blended fabrics
- Everyday clothes that tend to wrinkle in a suitcase
Always check the care label before steaming, especially when working with delicate fabrics.
I’m more cautious with silk, wool, specialty fabrics, coated materials, and garments with delicate embellishments.
If the care label specifies low heat, prohibits steaming, or gives other special-care instructions, follow the garment manufacturer’s recommendations.
A travel garment steamer is meant to make clothing care easier, but it shouldn’t replace the care instructions provided for the garment.

Can You Bring a Travel Steamer on a Plane?
A portable garment steamer is a common type of small electrical appliance, but baggage rules can vary between airlines, airports, and security authorities.
If I pack a steamer in my carry-on, I usually:
1.Empty the water tank completely.
2.Make sure the device has cooled down completely.
3.Secure the power cord.
4.Pack it somewhere that’s easy to access if necessary.
5.Check the airline’s current baggage requirements before flying.
Emptying the tank before you leave also makes the steamer easier to pack and reduces the chance of problems during security screening.
Because airline and airport rules can change, it’s worth checking the latest requirements before your trip rather than relying on general assumptions.
How I Choose a Travel Steamer
If you’re comparing travel steamers, start with three questions.
How many garments do you need to steam?
For a short weekend trip, a lightweight model is usually enough. If you’re packing several outfits, look more closely at water capacity and steaming time.
How many garments do you need to steam at once?
If you’re only freshening up one or two pieces a day, a smaller water tank may be all you need.
If you’re taking a longer business trip and expect to steam several outfits in one session, a larger tank can be more convenient.
Do you travel internationally?
If the answer is yes, look closely at whether the steamer supports 100–240V worldwide voltage.
After using travel accessories on different trips, I’ve found that the basics usually matter more than a long list of extra features. For a travel steamer, I’d pay particular attention to size, weight, heat-up time, water capacity, and voltage compatibility.
The right model should be easy to pack, quick to use, and practical for the kind of trips you actually take.
A few minutes of steaming can be enough to make a wrinkled shirt or dress look much more presentable before you head out.
That’s the real benefit of having a travel steamer for garments: it solves a small but annoying problem without taking up much room in your luggage. Whether you’re traveling for business, taking a weekend getaway, or heading overseas, the right model can make it easier to keep your clothes looking their best throughout your trip.